PROBLEM WITH THIS WEBPAGE?
Report an accessibility problem
To report another problem, please contact emily.newell@marquette.edu.
Marquette is committed to providing an inclusive and diverse learning environment for our students. An accessible PDF ensures most people can view or interact with your document. Read a more in-depth definition of what makes an accessible PDF.
The best way to ensure your pdf is accessible is to work with the original source document, and ensure its accessibility using the Tutorials and Guides for creating accessible content. When you export or save the document as a PDF the accessibility features will be passed to the PDF.
If you do not have the original source document, accessibility features can be added to the PDF using Adobe Acrobat. How to aquire Adobe Acrobat.
Using Adobe Acrobat, follow these steps to check your pdf for accessibility. You can also consult WebAIM’s tutorial on PDF Accessibility for further information about pdf accessibility requirements.
Live text is the most basic form of accessibility, it means the text can be read by a screen reader, converted to braille, or increased in size without loosing fidelity.
Examples of inaccessible pdfs:
Try selecting text using a mouse, or select all text using Edit > “Select All” from the Acrobat menu. If nothing is selected you document dose not have live text and is not accessible. In this situation, most documents will need to be recreated to include accessible live text.
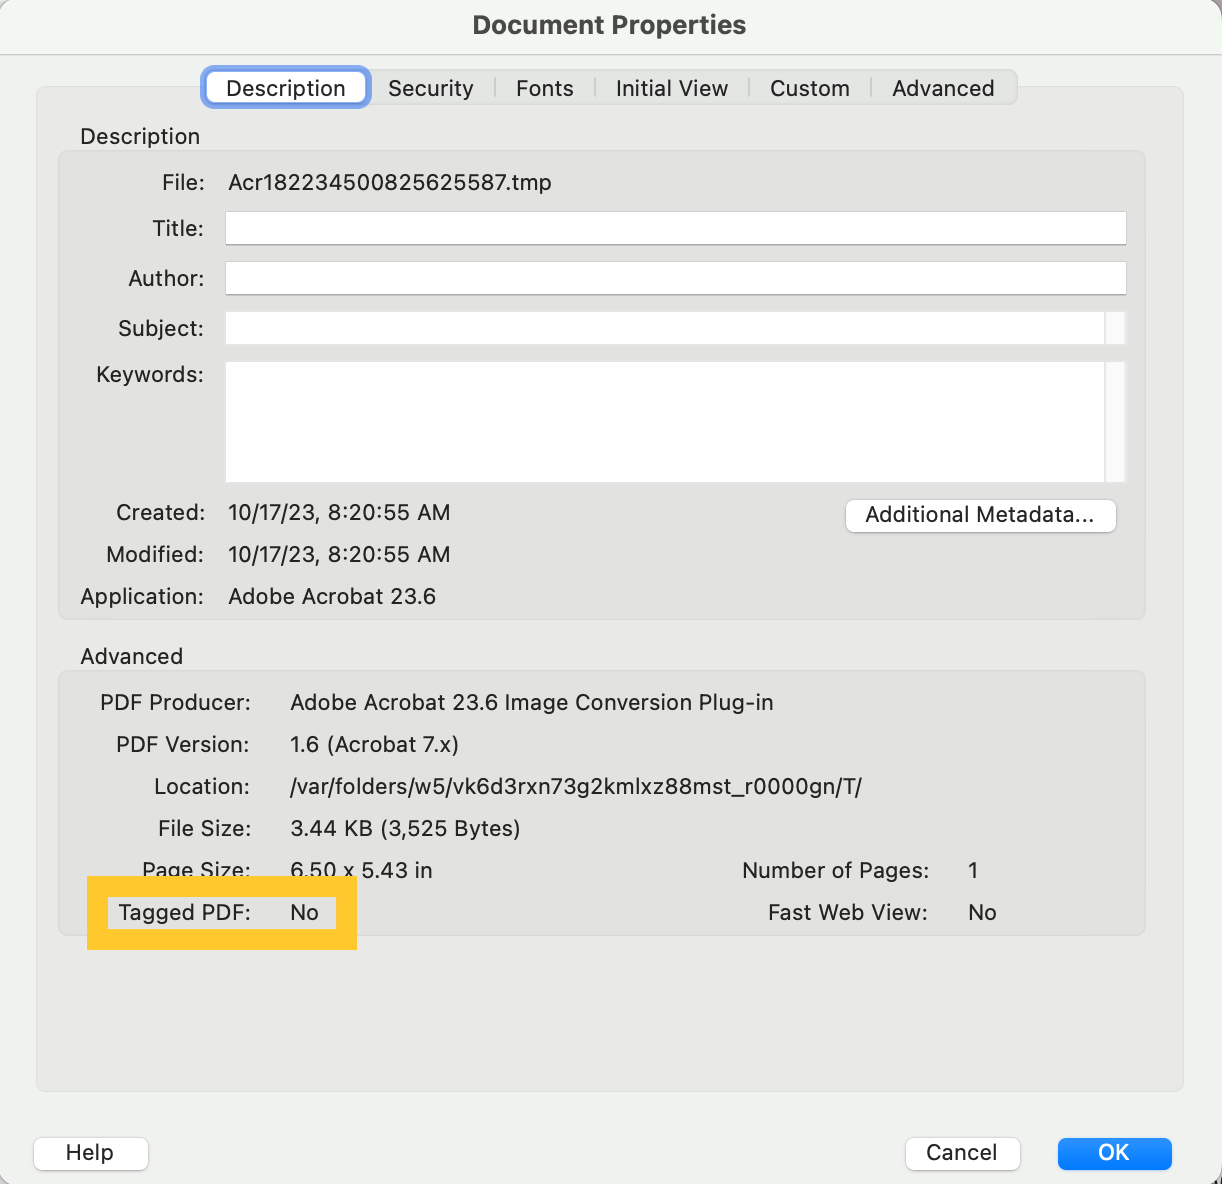 Accessible PDFs are tagged with headings, paragraphs, and tables, aiding screen readers in deciphering the flow of the content. To check if your document is tagged, go to File > Properties. In the bottom left corner of the Document Properties window, find the “Tagged PDF” field.
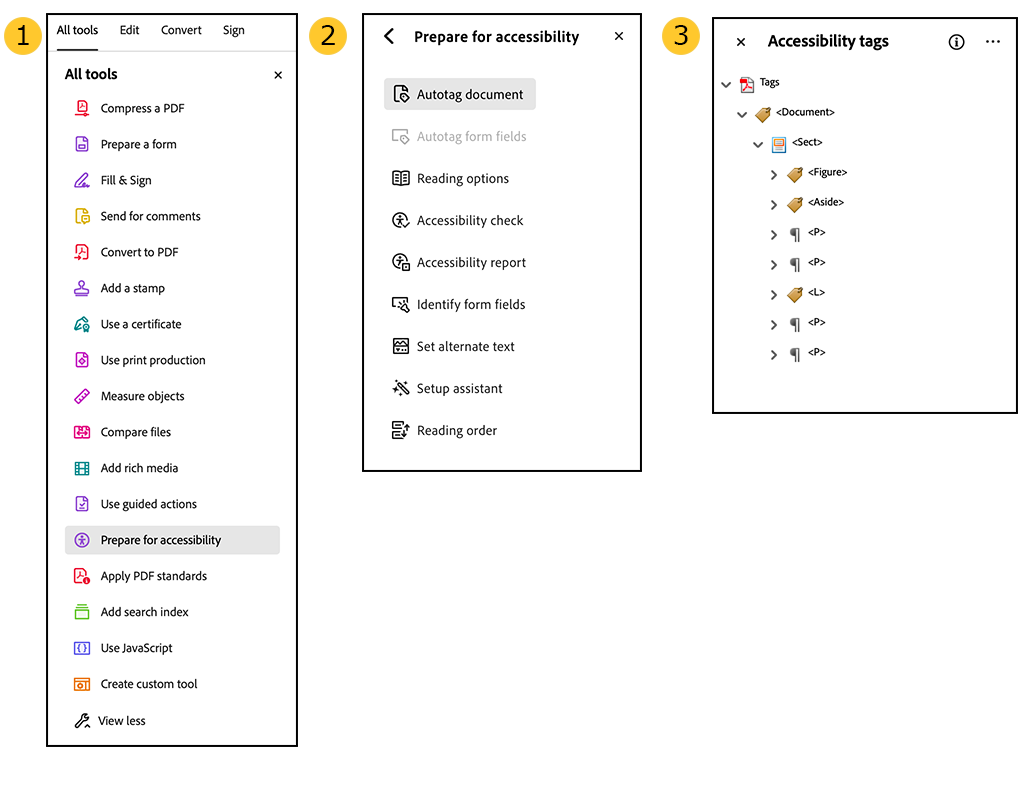
If No, your PDF lacks this structure, it will need to be added via Acrobat. For a more in depth look at tags visit "Tagging a PDF in Adobe Acrobat Pro".
Adobe Acrobat has a built-in accessibility checker that can identify any remaining accessibility problems. To run the accessibility checker:
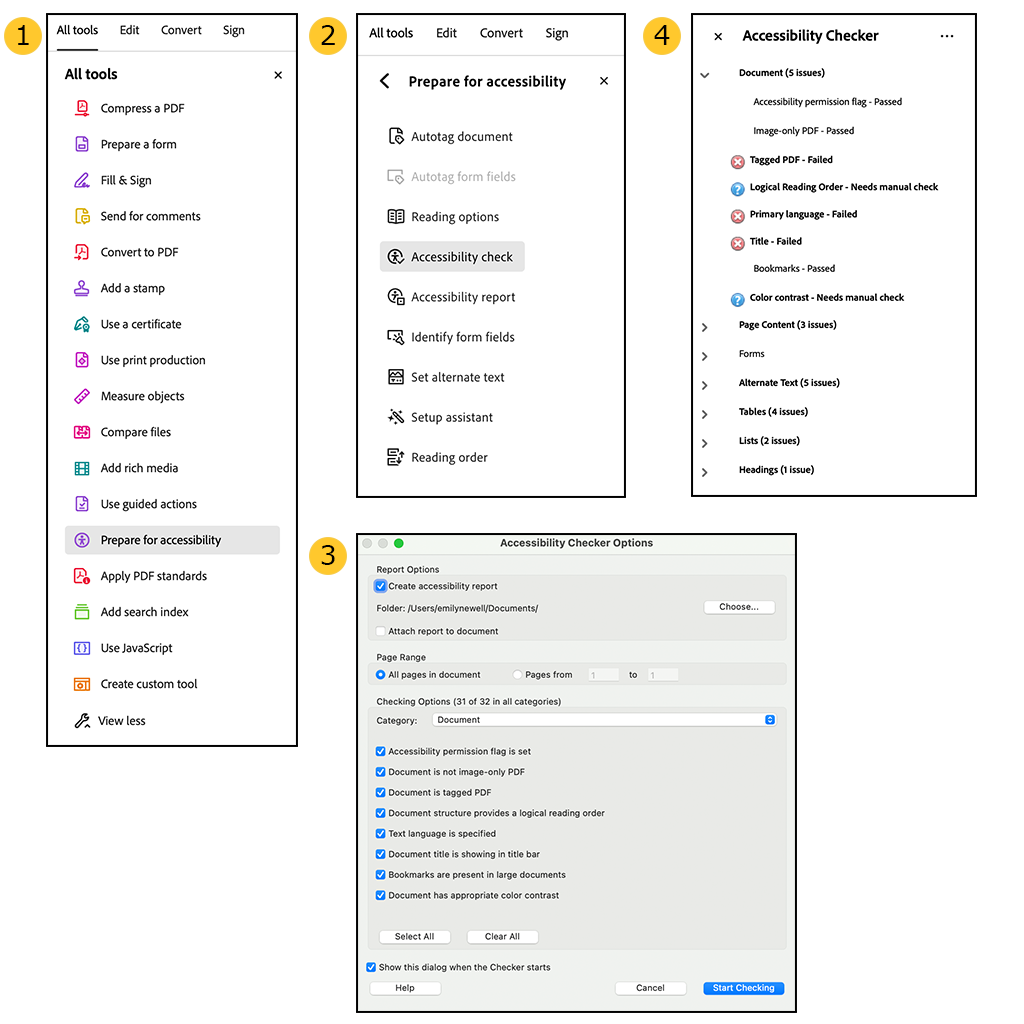
The report will list items in categories such as Document, Page Content, etc. The report will indicate whether the item has passed, failed, or requires manual inspection. Right-click on any item to see a list of options for fixing the problem.
The Reading Order tool helps you review and repair a document's structure. To use this tool, go to the Accessibility toolbar and select Reading Order.

One of the most common complaints from those who use assistive technology is when a PDF’s reading order is off.
The reading order in a PDF is the order in which content in the document will be read to people using assistive technology. This is done with the tags; whatever order the tags are in is the order in which the content of the document will be read.

Privacy Policy Legal Disclaimer Non-Discrimination Policy Accessible Technology
© 2024 Marquette University